Goodies are the heart of your GuestGoodie app. Here you'll learn how to create new goodies, edit existing ones, and optimally configure them for your guests. From simple info to complex bookable services – we'll show you step by step how it works.
Create Goodie
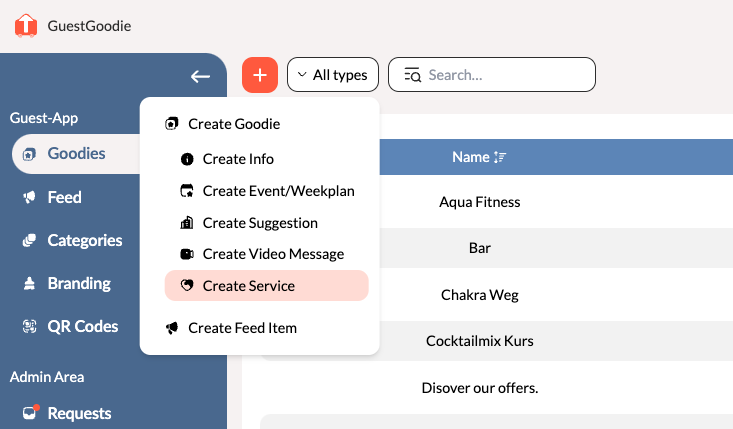
Step 1: Create New Goodie
- Go to "Goodies" in the sidebar
- Click on the large Plus symbol in the top bar
- Select the appropriate goodie type from the dropdown menu
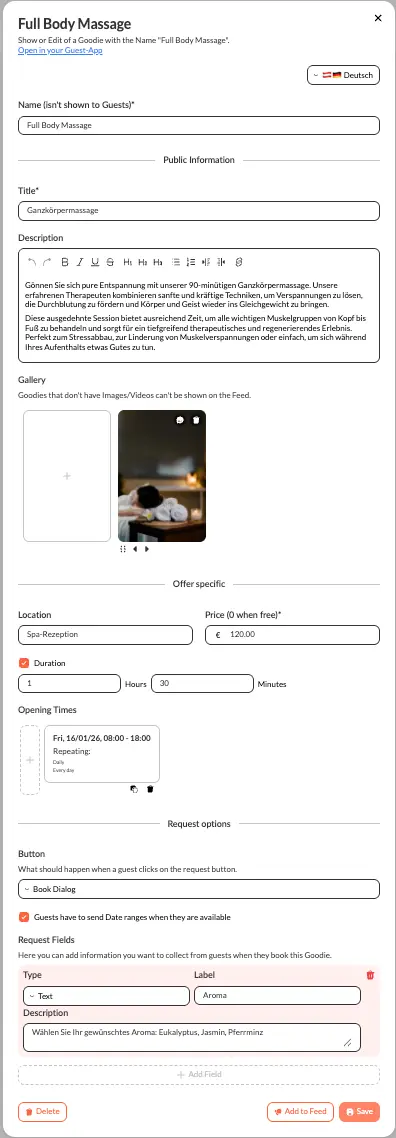
Name (not displayed to guests)*
The internal name for your management – guests don't see this. Use descriptive names like "Hand Massage 90min" or "Yoga Class Monday".
Public Information
- Title* The name your guests see (e.g. "Relaxing Hand Massage")
- Description: Detailed information about the offer (optional for some types)
Step 3: Add Images and Videos
Important Note: Goodies without images/videos cannot be displayed in the feed.
Upload at least one appealing image or video that best presents your offer. High-quality visual content is crucial for booking rates.
Step 4: Type-Specific Settings
Depending on the goodie type, you'll find different options here – more details below.
Step 5: Save and Activate
You have two options:
- "Save": The goodie is saved and available for categories and promotions
- "Save and add to feed": After the goodie is saved, you can immediately create a promotion, see: Feed Management
The 3 Goodie Types in Detail
1. Offer - Versatile All-rounder
For: All types of services, recommendations, and information
The Offer type combines multiple use cases in one flexible system. You decide via the button type how guests interact with the offer.
Basic Settings:
- Location: Where does the offer take place or where is it located?
- Price (0 if free)* Price in your hotel currency
- Duration: Optional - how long does the service last or how much time should be planned?
- "Opening hours": When is the offer available?
Button Options - Choose the Right Interaction:
Bookable - For Bookable Services
Ideal for: Massages, treatments, room service, personal services
Booking Options:
- "Guests must send date ranges when they are available": Guests suggest time slots, you confirm a specific appointment
- Without this option: Guests choose specific times, you can only accept or decline
- "Request Fields" (RequestFields): Create custom fields that guests must fill in when booking
Request Field Types:
- Text Field: Short answers (e.g., membership number, voucher code)
- Textarea Field: Longer answers (e.g., special requests, allergies, notes)
- Dropdown: Selection from predefined options (e.g., massage type: Sports, Relaxation, Thai)
- Checkbox: Yes/No options (e.g., "I have allergies", "Vegetarian menu requested")
- Stepper/Number: Numerical values (e.g., duration in minutes, number of courses in a menu)
Link - For External Recommendations
Ideal for: Restaurant recommendations, sights, excursion tips
Link Settings:
- "External website": Link to official website (e.g., museum, restaurant)
Guests see a button that takes them directly to the external website.
File - For Downloadable Content
Ideal for: Menus (PDF), spa brochures, maps, instructions
File Settings:
- Upload file: PDF or image that guests can open or download
Perfect for information guests want to save or print.
Ideal for: Bar info, fitness studio, pool rules, WiFi information
No button action – guests only see the information, videos, images, and description. Ideal for pure informational offers without booking or link.
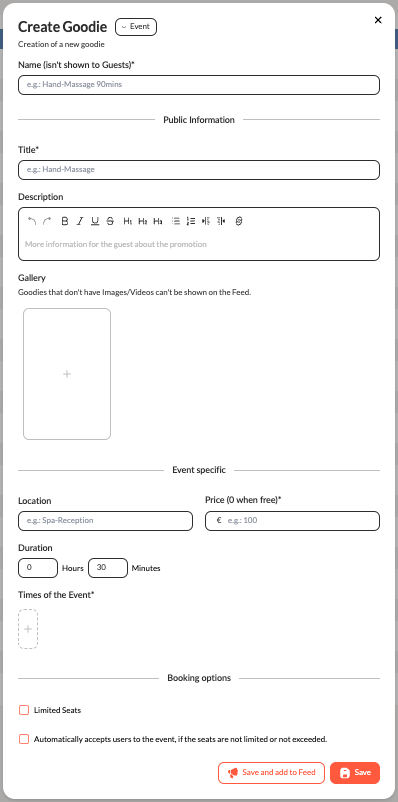
2. Event/Weekly Schedule - Planned Activities
For: Yoga classes, wine tastings, cooking classes, hikes, happy hour, live concerts
Event-specific Settings:
- Location: Where does the event take place?
- Price: Participation fee (if applicable)
- Duration: How long does the event last?
- Event times: When does it take place? (with repetition)
- "Can Join during Event": Enable this for events guests can join while it's already happening (e.g., happy hour, live music, open sports events)
Button Options for Events:
Bookable - Guests Can Register
Booking Options:
- "Limited seats": Set maximum number of participants
- "Automatically accepts users for the event": Immediate confirmation without manual approval
- "Request Fields" (RequestFields): Create custom fields for registration (see Request Field Types above)
Ideal for events without registration like happy hour or live concerts where guests can just drop by.
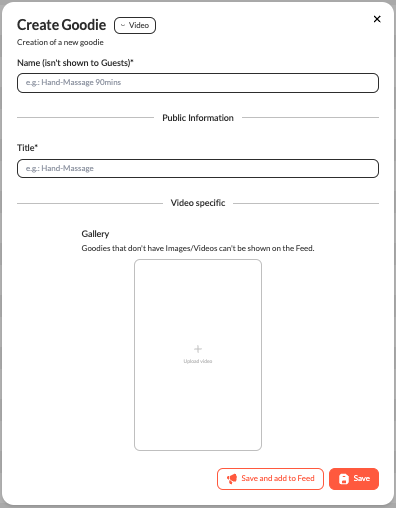
3. Message - Personal Messages
For: Welcome greetings, weather updates, personal invitations
Special features:
- Only Title and Gallery (mostly videos)
- Videos can have subtitles
- Perfect for authentic video messages from your team
Edit Existing Goodie
- Go to the Goodies tab in the sidebar
- Find your goodie in the list (use the search or filter function with many entries)
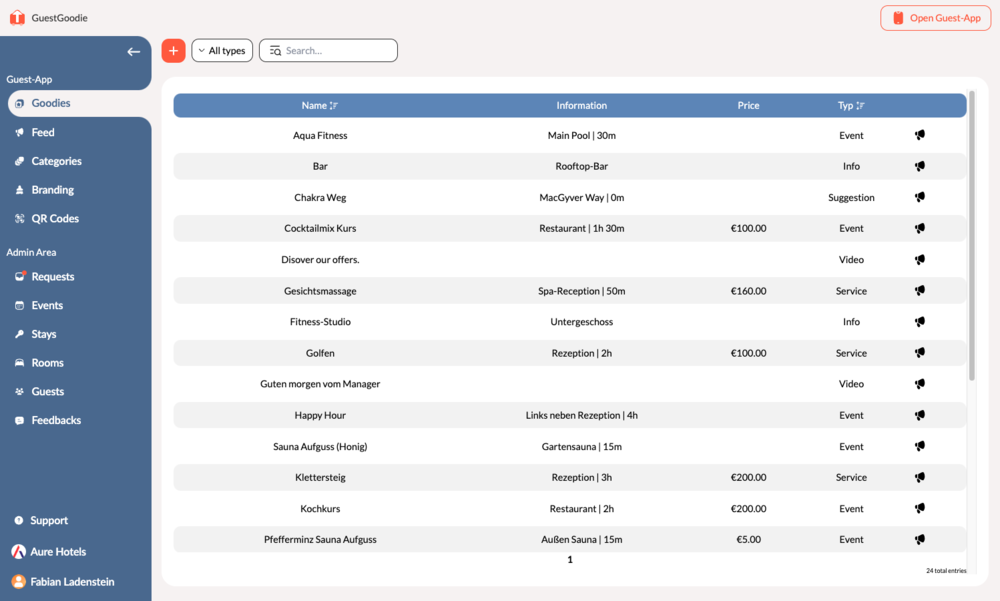
- Click on the name of the goodie you want to edit
- The editing dialog opens
- Make your changes
- Click "Save" to apply the changes
Delete Goodie
Caution: Deleted goodies cannot be restored!
- Open the goodie for editing
- Scroll to the end of the dialog
- Click on "Delete" (red button)
- Confirm deletion
Note: If a goodie is deleted that has promotions, these will also be automatically deleted.
Permissions and Tips
Permissions
You only see the functions you are authorized for. If you cannot create certain goodie types or don't see settings, contact your administrator, see: Manage Your Team.
Best Practices
- Descriptive names: Use internal names that you can easily find again
- High-quality images: Without visual content, goodies cannot be promoted in the feed
- Clear descriptions: Guests should immediately understand what to expect
- Transparent pricing: "0" for free offers, otherwise the full price
- Choose button type consciously: Consider which interaction makes most sense for your offer
- Use request fields: Collect exactly the information you need when guests book
→ Advanced tips: [Blog: Psychology of Successful Guest Offers] (Link to blog post)
Next Steps: Organize your goodies in Categories and create promotions for the feed to proactively reach your guests.