Successfully Setting up GuestGoodie
Welcome to GuestGoodie! This guide will take you through the first important steps to optimally set up GuestGoodie for your hotel.
What You Need Before Starting
Before you begin setup, make sure you have at least the following information ready:
- Hotel Information: Hotel name, currency, time zone
- User Information: Name, email or Google account
- Branding Materials: Logo, brand color
Step 1: Create User
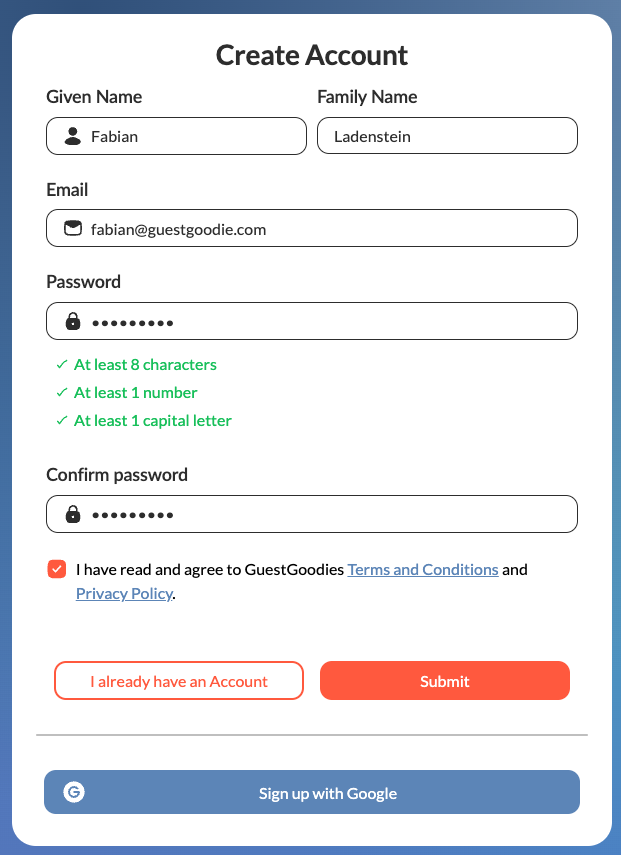
- Fill out all user information or register with Google.
- Confirm your details.
- You will receive a verification code for your email which you must then enter in the field.
If you already have a user, you can use it with multiple hotels. Simply click on your hotel in the back office at the bottom left and click "New Hotel".
Step 2: Create Hotel
- After successfully creating your user, you can immediately create a hotel.
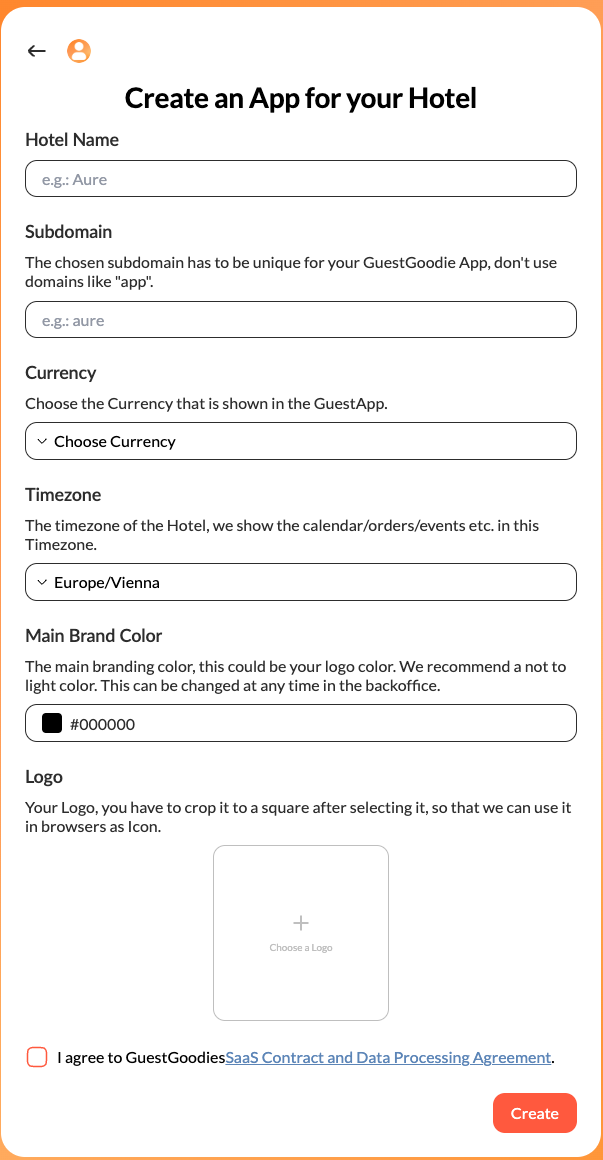
- Fill out all requested hotel information. All data except the subdomain and name can be changed at any time later.
- For the logo you will be asked to crop it to a square, as this is also used as an icon on the internet.
- Click "Create" and your guest app will be prepared for you.
- Your guest app is automatically created in "Test Phase". This means you have 30 days to test GuestGoodie for free. As soon as you are convinced by GuestGoodie, click the button at the top of the screen in your back office.
Your guest app is already available at https://[YOUR_SUBDOMAIN].guestgoodie.com, but it is currently still empty.
Now you just need to personalize it and make it your own.
Step 3: Create Rooms and Guests
First, guests and rooms must be connected, for this you have two options:
- Manual creation of rooms - Create rooms manually in our back office.
- Manual creation of guests - Create guests manually in our back office.
- PMS Integration - Connect your PMS and synchronize your rooms and guests automatically.
Step 4: Create Content
There are various ways to make GuestGoodie your personal guest app.
Step 5: Give Your Team Access
Of course you need your team to process and maintain requests/goodies etc. Here too, GuestGoodie offers full configuration options:
Step 6: Show Your Guests Your Personalized Guest App
- Create stays - Create and edit guest stays in your hotel.
- Create QR codes - GuestGoodie comes with a QR code generator that you can use to direct guests to your guest app.